How does Touch ID work?

On an iOS device, there's a capacitive ring around the Touch ID sensor; on the new MacBook Pro, the entire Touch ID sensor is capacitive. When the sensor detects a finger, it triggers a high-resolution image capture. That image is converted into a mathematical representation, which is then sent through the hardware channel to a secure enclave. If the representation matches what's stored in the enclave, a "yes" token is released and the Touch ID action is authenticated. If not, a "no" token is released, all you get is a digital head shake. Every time Touch ID scans a finger and recognizes it, it adds additional detail to the representation, theoretically to make it register even faster and better in the future.
Troubleshooting trippy Touch ID authentication
Here are a few tips and tricks to try if you're experiencing Touch ID issues:
- During the registration process, make sure you move your finger around enough that the entire surface gets scanned during the first stage, and then every edge gets scanned during the second phase.
- Any sweat or liquid on your finger at all can interfere with the scan. Wipe both your finger and the Home button off and dry them completely before using Touch ID.
- The sequential improvement process can sometimes go off-track (i.e. instead of getting better, an error can occur and it can get worse). When that starts to happen, delete the fingerprint and re-register.
- On an iOS device, make sure your finger is touching the capacitive metal ring and the Home button.
- Touch ID is super fast these days, but you should still refrain from lifting your finger too quickly.
- Try to keep your finger in one place when you're authenticating — you don't want to move your finger around too much.
- If you're rockin' a screen protector or case, you don't want it to cover up the capacitive ring or the Home button — that could cause errors with Touch ID authentication.
- If all else fails, it's time to head to the Apple Store for one-on-one support.
How to delete and re-add your Touch ID fingerprints
How to delete and re-add your Touch ID fingerprints on Mac
Follow these steps to delete your Touch ID fingerprints on Mac:
- Click on the Apple menu icon in the upper left corner of your Mac's screen.
- Select System Preferences from the drop down menu.
- Select the Touch ID preference pane.
- Hover over the fingerprint icon you wish to delete until you see the X in the upper left corner, then click on it.
- Enter your password.
- Press Delete to confirm.

Follow these steps to add your Touch ID fingerprints on Mac:
- Click on the Apple menu icon in the upper left corner of your Mac's screen.
- Select System Preferences from the drop down menu.
- Select the Touch ID preference pane.
- Click on Add a fingerprint.
- Enter your user password.

Serenity Caldwell put together an extensive guide on Touch ID for the new MacBook Pro. You can check it out at the link below
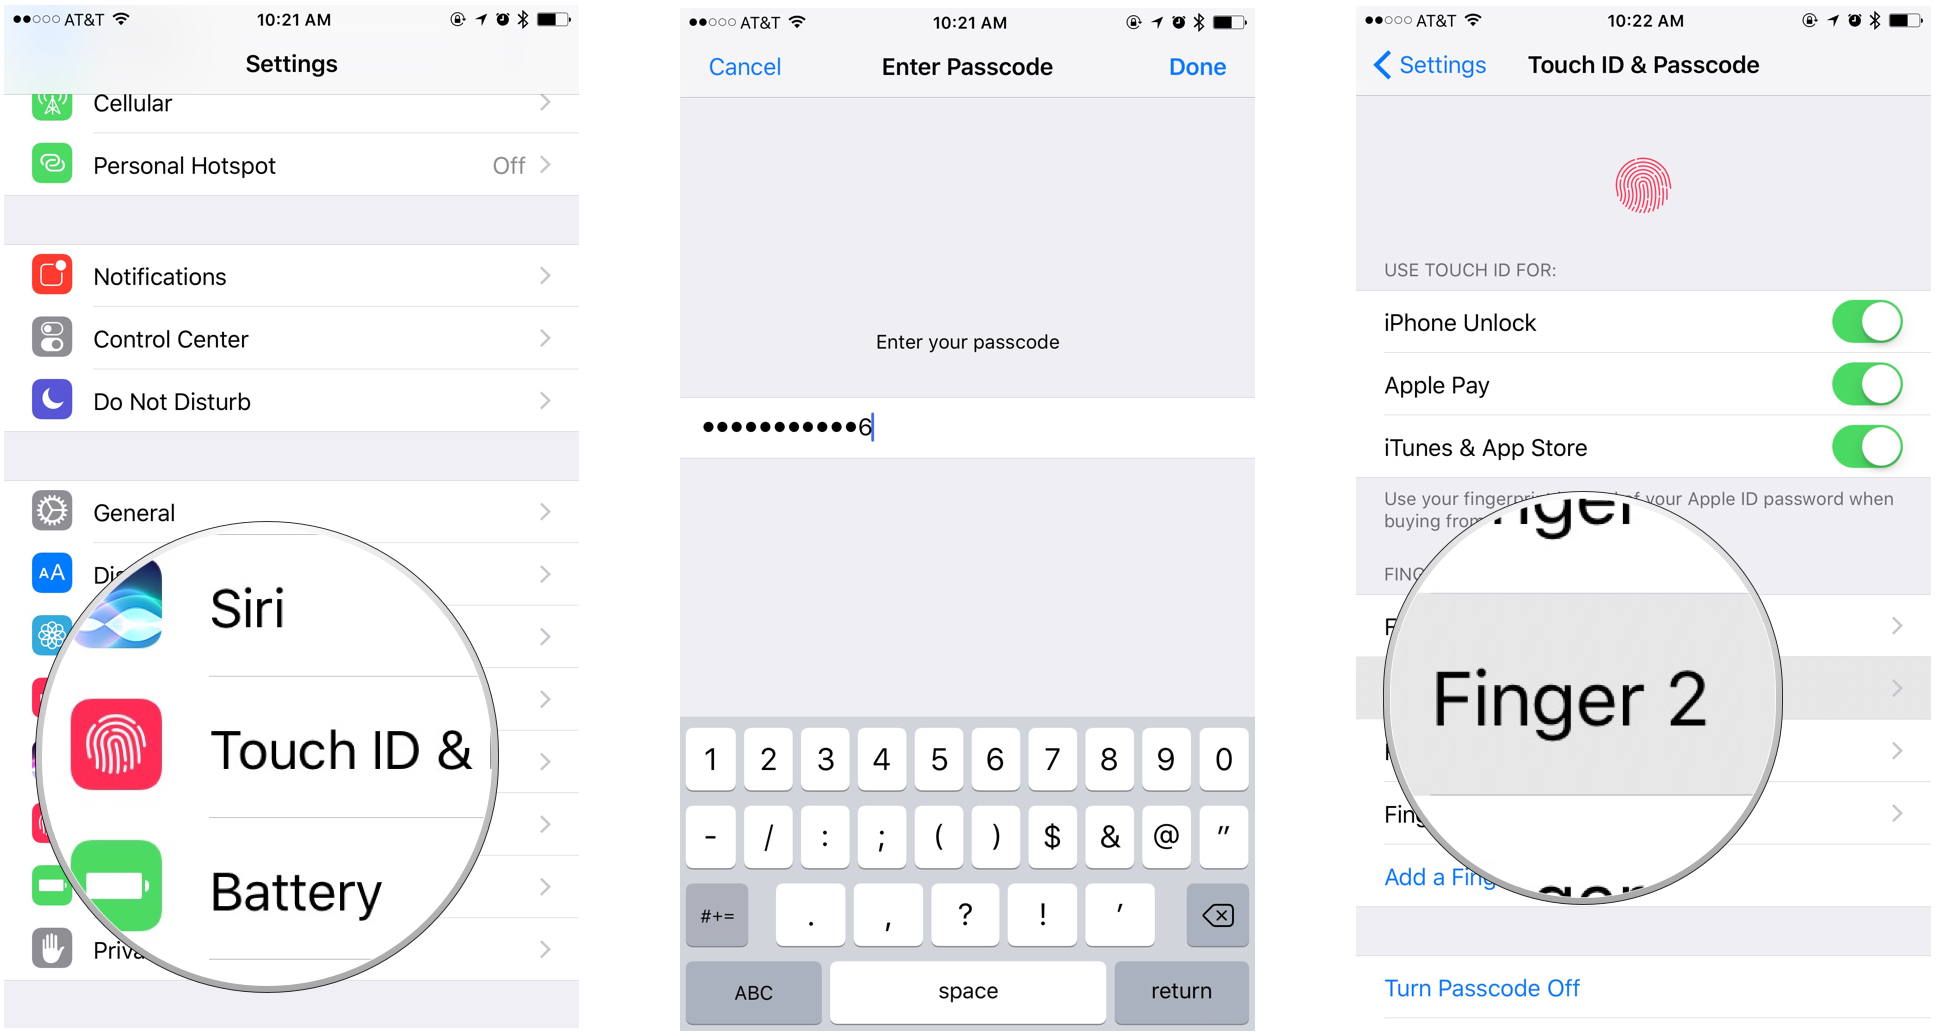
How to delete and re-add your Touch ID fingerprints on iOS
If you're having trouble with Touch ID on an iOS device, here's how you wipe the slate clean and start again!
- Launch the Settings app.
- Tap on Touch ID & Passcode.
- Type in your Passcode when prompted.
- Tap on any fingerprint.

- Tap on Delete Fingerprint. Repeat this until all your fingerprints are removed.
- Tap on Add a Fingerprint...
- Follow the on-screen prompts to set up a new fingerprint.


0 comments: